




How to Identify Bucket Teeth Size and Type Before You Order
Summary: About blog: A step-by-step guide to identifying bucket teeth size and type before you order. Covers where to find the part number, what to measure on the adapter and bucket lip, how tooth profiles suit different ground, and how to avoid wrong orders.
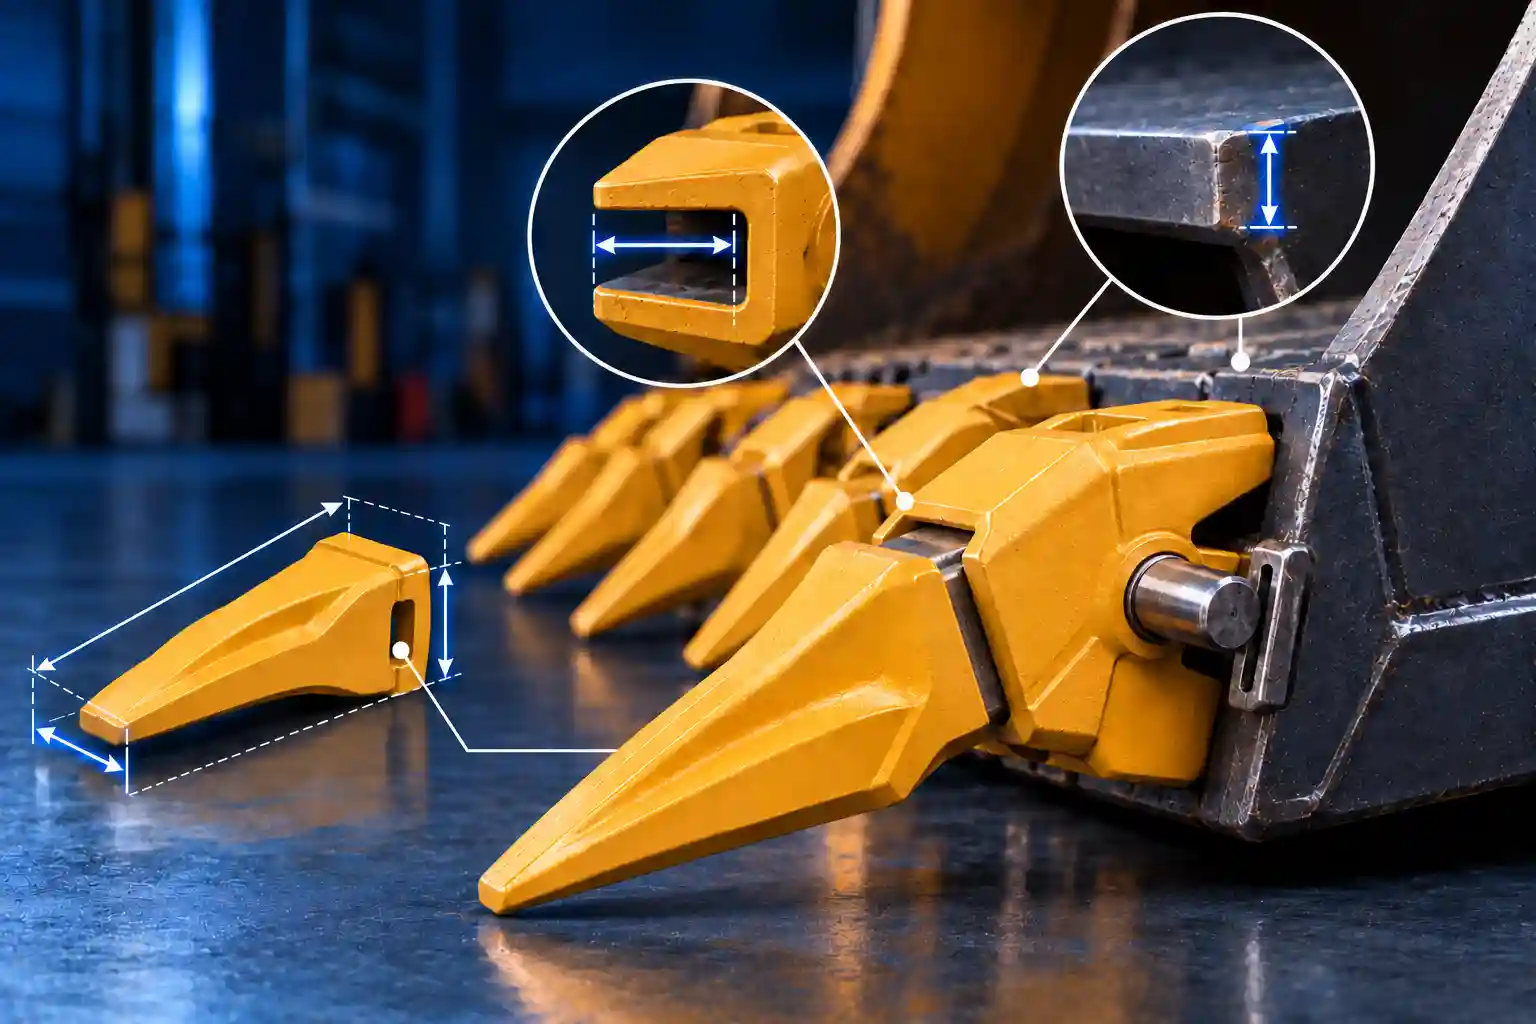
Ordering bucket teeth looks simple until the wrong ones arrive. The tooth is the right shape but the wrong size, or the profile suits soft soil when the job is hard rock. Each mistake means a delay, and a machine that waits for teeth earns nothing.
The good news is that identifying the right teeth takes a few minutes, as long as you check things in the right order. This guide walks through it, from reading the markings on the old tooth to matching the type to the ground you work on.
1. Know the Parts of a Tooth System
A typical bucket tooth system has three main components:
● The tooth point, which is the replaceable wear part that meets the ground.
● The adapter, which is fixed to the bucket lip and supports the tooth point.
● The pin or retainer, which secures the tooth point to the adapter.
The adapter determines which tooth points are compatible with the system. Replacing the tooth point is routine, while replacing the adapter is a larger job.
2. Start with the Markings on the Old Tooth
The fastest route to the right size is the old part itself. Clean the tooth point and look for:
• A part number cast into the back or side of the tooth.
• A maker's logo or size class mark.
• A number series, which usually tells you the size class of the system.
Many tooth systems use a number or size-series marking. If you find this marking, it can help identify the compatible tooth point and adapter. If the markings have worn away, move on to measuring.
3. How to Identify Bucket Teeth Size by Measuring
When the part number is missing, measurements can help identify the correct system. Take them on the adapter and the bucket, as these stay on the machine longer than the tooth point.
| What to measure | Where | Why it matters |
|---|---|---|
| Bucket lip thickness | At the point where the adapter sits | Sets the adapter size and fit |
| Adapter nose shape and size | Front of the adapter, where the tooth point slides on | Tooth point must fit this exactly |
| Tooth point length and width | Old tooth, from adapter to tip | Helps confirm the size class |
| Number of teeth and spacing | Across the bucket | Needed for a full set |
| Bucket width and machine model | Bucket and machine plate | Confirms the class of machine |
Write down each measurement and take a clear photo of the tooth from the side and from above. Photos make it easier for a supplier to confirm the match.
4. Match the Tooth Type to the Ground
The right size can still be the wrong tooth if the profile does not suit the work. Choose the type by the material you dig.
| Tooth type | Best for | Trade-off |
|---|---|---|
| General purpose | Mixed soil, clay, gravel | Balanced wear and penetration |
| Penetration (sharp) | Hard-packed soil, frozen ground, tight material | Wears faster in abrasive ground |
| Rock | Blasted rock, quarry work | Heavier and costlier |
| Flared | Loose, wide digging and loading | Less penetration |
| Abrasion | Sand and gravel | Slower to wear but blunter |
If your ground changes from job to job, pick the type that suits most of your hours rather than the rare case.
5. Match Size to the Machine Class
Tooth size scales with the machine and bucket. A small excavator uses small teeth, and a mining machine uses heavy, thick ones. An incorrectly sized tooth may fit poorly, increase stress on the tooth system, reduce penetration or damage the adapter and retainer.
The Tuffex range shows the idea clearly. It lists 11 tooth points and 11 corresponding vertical adapters, paired according to compatible machine models and bucket lip thicknesses. The Tata Hitachi EX70 is listed for a 20 mm lip thickness, the Komatsu PC200 for 30 mm, the Komatsu PC300 for 40 mm, the Komatsu PC400 for 50 mm, and the Tata Hitachi ZX370 and Volvo EC460 for 60 mm. Additional examples include the Komatsu PC71 for a 25 mm lip thickness, Tata Hitachi EX210 for 40 mm, Hyundai R210 for 35 mm and Sany SY215 for 40 mm. The listings also name the work they suit, such as quarry, construction, infrastructure and mining.
6. Know When Excavator Teeth Need Replacing
Worn excavator teeth can reduce penetration and digging efficiency and may increase fuel use. Replace the tooth point when you see:
• The tip is rounded or blunt.
• The tooth has worn well down from its original length.
• The adapter nose is visible or damaged.
• The tooth is cracked or chipped.
• Digging feels slower with the same effort.
Do not continue operating with a missing tooth. This can expose the adapter to accelerated wear and increase the eventual repair cost.
7. Related Wear Parts
When inspecting worn teeth, check the cutting edges and end bits at the same time. Cutting edges and end bits protect the lip between the teeth. Tuffex lists 21 cutting edges and 20 end bits, so it is sensible to check them when you order teeth.
8. Common Ordering Mistakes
| Mistake | What happens | How to avoid it |
|---|---|---|
| Ordering by machine model only | Size class may not match the bucket | Measure the lip and adapter nose |
| Choosing a sharp tooth for rocky ground | The tooth may wear rapidly or be more vulnerable to damage | Use a rock or heavy-duty profile |
| Replacing points on a worn adapter | New tooth sits loose and wears fast | Inspect the adapter first |
| Mixing different tooth types in one bucket | Uneven load and wear | Use a compatible, matched set unless the manufacturer specifies otherwise |
Wrong orders often result from skipping one or more of these checks. Recording the measurements and taking clear photos can help prevent returns and downtime.
9. Before You Order: A Short Checklist
• Note the machine make, model and bucket size.
• Record the part number or size class from the old tooth.
• Measure the lip thickness and adapter nose.
• Choose the tooth type for your ground.
• Take photos of the old tooth and adapter.
• Ask the supplier to confirm fit before you pay.