




Front Idler vs Rear Idler: Function, Position & Signs of Wear
Summary: About blog: Explains what a track idler does, how the front idler and rear idler differ in position and workload, and how to spot wear, leaks and tension problems early. Includes a quick inspection checklist and guidance on repair versus replacement.
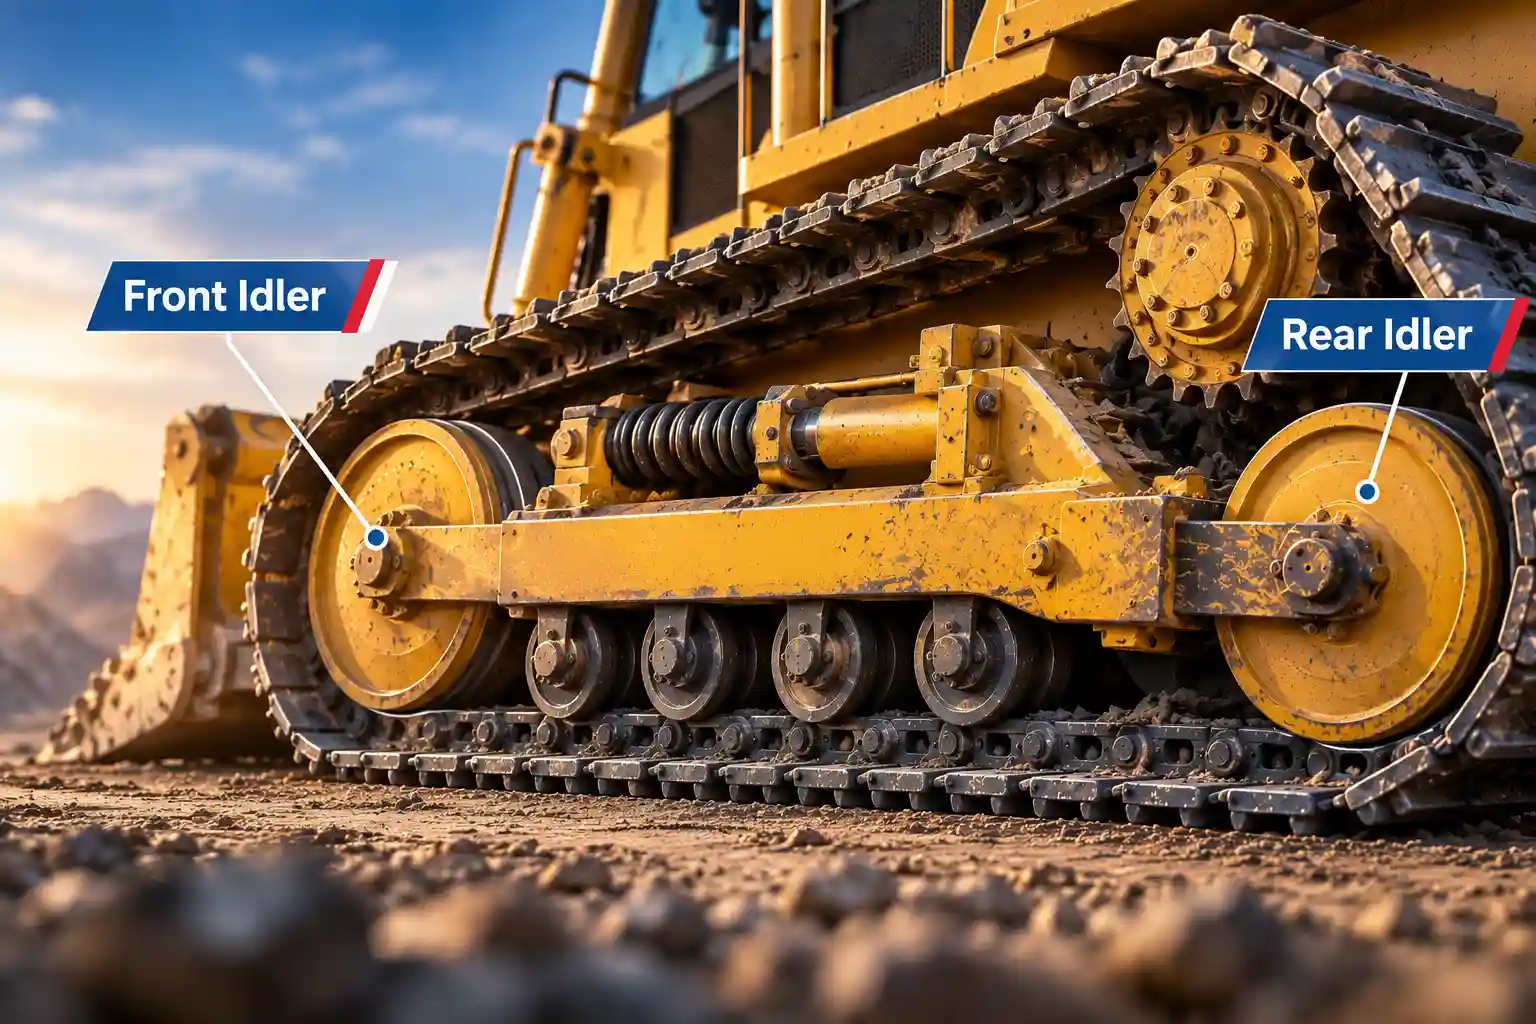
The idler is the part of the undercarriage most operators only think about when the track starts wandering. It does not drive the track or carry the machine’s primary weight like a track roller, but it guides the chain and withstands track-tension and impact loads. Knowing what each idler does, and where it sits, makes problems easier to catch and parts easier to order.
This guide explains the difference between front and rear idlers, how the idler works with the tensioner, which signs of wear matter most, and when repair makes sense. If you need the wider picture first, our undercarriage essentials guide covers every component on the track frame.
1. What a Track Idler Does
A track idler is an unpowered wheel that sits at the end of the track frame. It performs three main functions:
• It guides the track chain in a straight line as it turns around the frame.
• It holds the chain at the right tension, because the idler can slide forward or back on the frame.
• It absorbs shock when the machine hits rocks, stumps or uneven ground, passing the load to a recoil spring instead of the chain.
Because the idler runs in constant contact with the chain links, it wears in step with them. That is why the idler should be inspected along with the chain, rollers and sprocket. Replacement should be based on component measurements, wear limits and the machine manufacturer’s recommendations.
2. Front Idler vs Rear Idler: Position and Workload
The names describe where the idler sits relative to the sprocket, which is the powered wheel that drives the chain.
Front idler
The front idler is mounted at the far end of the track frame, opposite the sprocket. It is the idler that most excavators have, and it is the one connected to the recoil spring and track adjuster. It guides the track around the leading end of the frame and is exposed to impact and shock loads during travel.
Rear idler
A rear idler appears mainly on dozers with an elevated sprocket, such as the Caterpillar D8R, where the sprocket sits high at the back and a smaller idler guides the chain beneath it. It does not carry the tensioner. Its role is to keep the chain in line as it leaves the ground and travels up toward the sprocket.
| Point | Front idler | Rear idler |
|---|---|---|
| Position | Leading end of the track frame | Rear of the frame, below an elevated sprocket |
| Main job | Guides the track in, sets tension through the recoil spring | Guides the chain into the sprocket |
| Connected to tensioner | Yes | No |
| Common on | Excavators and dozers | Elevated-sprocket dozers |
| Typical wear pattern | Flange and tread wear from first ground contact | Slower tread wear, alignment-related damage |
So on a standard excavator you will usually deal with one idler per side. If your machine is a dozer, check the parts book before ordering, because the front and rear units are not interchangeable.
3. How the Idler Works with the Track Tensioner
The idler does not hold tension by itself. It rides on a sliding yoke that is pushed forward by a recoil spring, and a grease-filled adjuster cylinder sets how far forward it sits. Pumping grease into the cylinder tightens the track. Releasing it loosens the track.
When the machine hits a hard obstacle, the spring compresses and lets the idler move back for a moment, then returns it to position. This protects the chain, the final drive and the frame from sharp loads.
Tension matters more than most owners expect. A track that is too tight increases the load on the idler, rollers and sprocket. A track that is too loose can jump off the idler and wear the guiding flanges faster. Always check sag against the OEM figure for your model.
4. Signs of Wear to Look For
Most idler problems show up long before the part fails. Conduct a walk-around inspection at the start of each shift and look for the following:
| Sign | What it usually means | Action |
|---|---|---|
| Track pulls to one side or wanders | Worn or misaligned idler, uneven tread wear | Inspect both idlers and compare wear |
| Flat spots or deep scoring on the tread | Idler seized or not rotating freely | Check the bearing and seals, plan replacement |
| Thin or knife-edged flanges | Guiding flanges worn, chain is no longer held in line | Replace before the track derails |
| Oil leaking from the idler hub | Seal failure, bearing at risk | Repair or replace the idler |
| Grease leaking at the adjuster, track keeps going slack | Cylinder seal or valve fault | Service the tensioner |
| Cracks or a bent shaft | Impact damage or overload | Stop work and replace |
| Squealing or knocking while travelling | Dry bearing or loose yoke | Inspect immediately |
If one idler is badly worn and the other looks fine, check the track frame alignment too. A bent frame will wear a new idler just as fast.
5. Repair or Replace?
Not every idler problem needs a new part. The right answer depends on what has failed.
Excavator idler wheel repair
Excavator idler wheel repair is possible when the wear is limited to the tread or flange surface. Depending on the manufacturer’s specifications and the extent of the damage, a qualified repair facility may be able to rebuild the tread or flange through controlled welding and machining. Repair is generally unsuitable when the shell is cracked, the shaft is bent or insufficient material remains.
Excavator track tensioner repair
Excavator track tensioner repair usually means replacing the seals in the adjuster cylinder or the grease valve, or replacing a weak recoil spring. Where appropriate, these repairs may cost less than replacing the complete tensioner assembly and can restore proper track tension.
Take care when working on the adjuster. The grease inside is under very high pressure, so never loosen the valve more than the OEM manual allows, and never stand in line with it. If the cylinder will not release or the spring is stuck, have a trained technician handle it.
• Repair when wear is on the surface and the shell and shaft are sound.
• Replace when the idler is cracked, bent or has worn flanges.
• Inspect the chain, rollers and sprocket at the same time. Replace worn or matched components together where measurements and manufacturer recommendations indicate that this is necessary.
6. A Quick Idler Inspection Checklist
• Check track sag against the OEM figure.
• Look at the flange height and tread surface on both idlers.
• Where permitted by the service manual, have a trained technician check that the idler rotates freely after the machine has been safely raised and secured.
• Look for oil or grease around the hub and the adjuster.
• Check that the idler sits centred on the track frame.
• Compare wear on the left and right sides.
• Record hours and findings so the next inspection is faster.
7. Choosing a Replacement Idler
Ordering a replacement excavator idler starts with confirming the machine’s make and model and whether a front or rear unit is required. Then match the dimensions on the part, not just the model name, because fit varies between model years.
Tuffex lists 67 idler assemblies across 50 models from 10 OEMs, including Caterpillar, Komatsu, Volvo, Tata Hitachi, Kobelco, Hyundai, JCB, Sany, Shantui and XCMG. Key dimensions and specifications are provided on the product listing where available. For example, the Tuffex idler group for the ZX670H is listed with A=400, B=90 and D=24. Berco and ITM units carry a 12-month or 2,000-hour warranty, and Tuffex-brand idlers carry 6 months or 1,000 hours.
If you are replacing the idler along with other parts, ask for a matched set. It is the simplest way to avoid uneven wear.